Quick Start Guide
In this walkthrough, we will communicate between two Blueprints without creating a single Cast To node or Blueprint Interface.
Step-by-Step Walkthrough#
Add an Auto Call Node
Open your player character or weapon Blueprint. Right-click in the Event Graph and select Auto Call.
Pick Your Target Function
Double-click the newly placed node, or click the Select Member... button. The search picker will appear. Type the name of the function or custom event you want to trigger (such as TakeDamage or PlayFootstepSound) and press Enter.
Connect Your Target Object
Connect your target actor reference—such as the Hit Actor pin from a line trace or Get Player Character—directly into the Target pin.
Supply Function Parameters
AutoMember automatically creates matching input pins for all parameters required by your chosen function. Wire your values and press Compile.
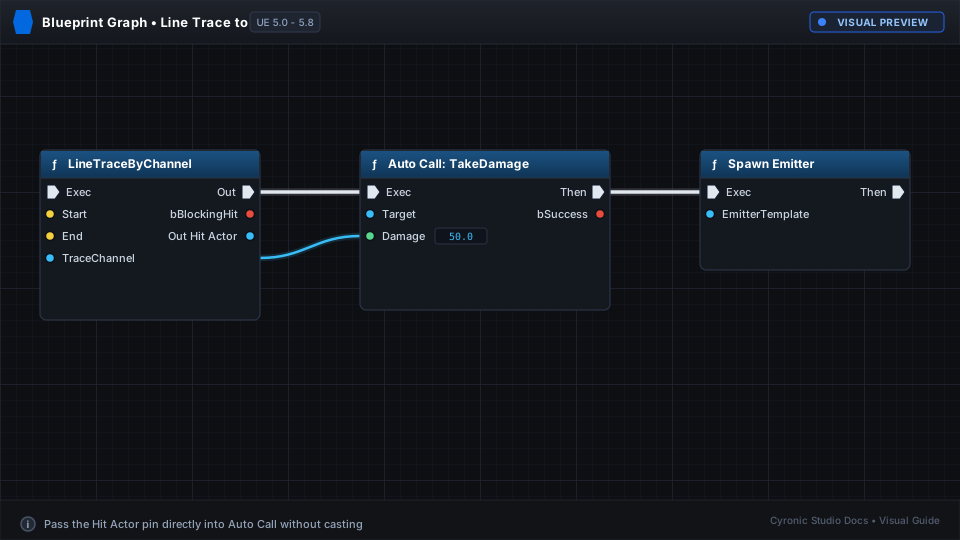
Notice how the pins on the Auto Call node automatically changed their names and colors to match the exact arguments of your target function. If you change the function later, AutoMember updates the node automatically.