Quick Start Guide
Converting an existing projectile to use ObjectPooling takes less than 5 minutes.
Step-by-Step Setup#
Implement Poolable Interface (Optional but Recommended)
Open your projectile Blueprint (e.g.
BP_Projectile). Click Class Settings at the top. Under Interfaces, click Add and select Poolable Interface.Replace Spawn Actor Node
In your weapon or character firing logic, find your old Spawn Actor From Class node. Replace it with Spawn Actor From Pool.
Configure Spawn Parameters
Select your projectile class in the Actor Class pin. Connect your muzzle transform to Spawn Transform, and optionally set an Auto Return Duration (e.g.
3.0 seconds).Return on Hit
In your projectile's collision logic, replace Destroy Actor with Return Actor To Pool.
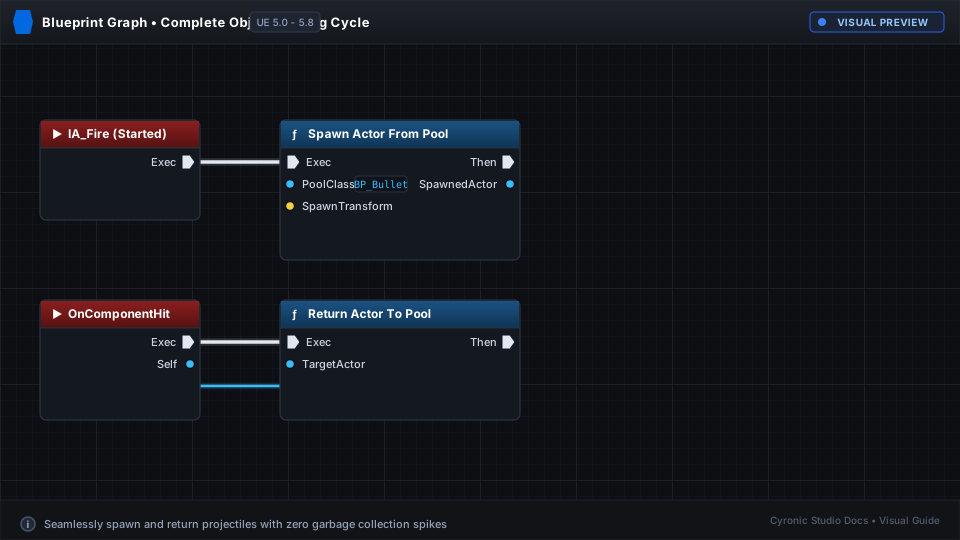
Click to expand